
Create a Paging Group
Navigate to Services > Elevate > Groups.
Click the Create group button.
Select Paging Group and click Proceed.
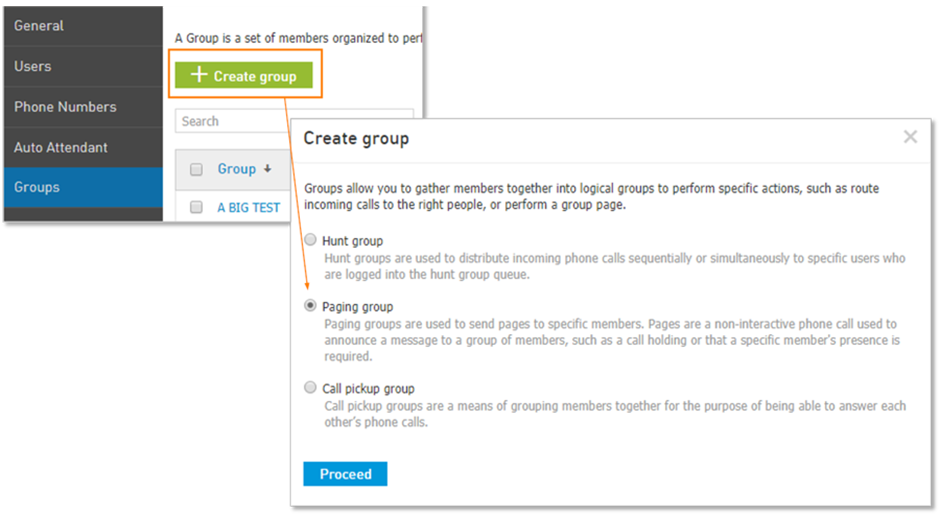
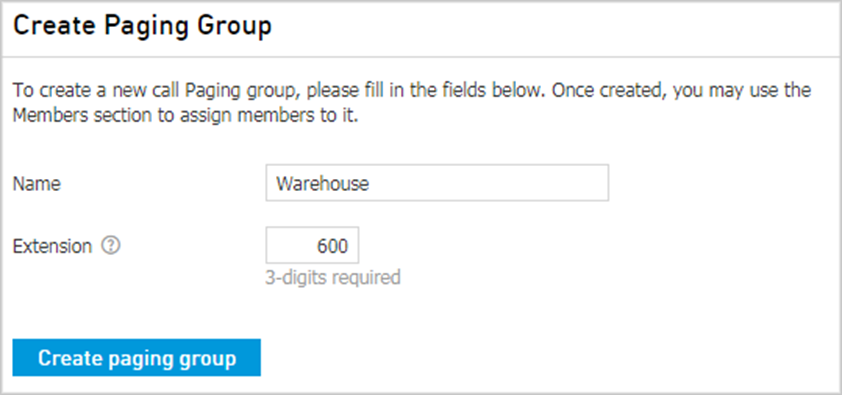
Enter the Paging Group settings:
Paging Group Name: Choose a meaningful name for the group, for example, Sales or Customer Service.
Extension: Type 3–6-digit extension that is not assigned to a user or any other service.
Now you will see the new Paging Group name listed on the Groups tab, and you can open it for editing.
You can manage a few additional parameters of the Paging Group that you have created.
On the General Tab you can:
Edit the name of the paging group.
Modify the extension number.
Add a note for description of the Group (this is purely for quick identification to Admins that log into CONTROL PANEL