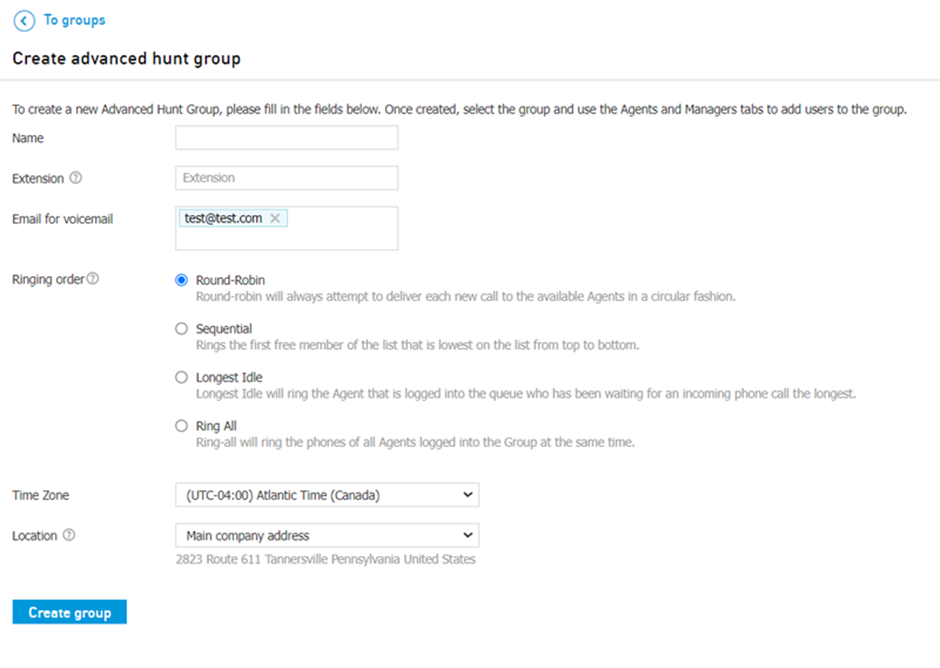
Creating an Advanced Hunt Group
Navigate to Services > Elevate > Groups.
Click the Create group button.
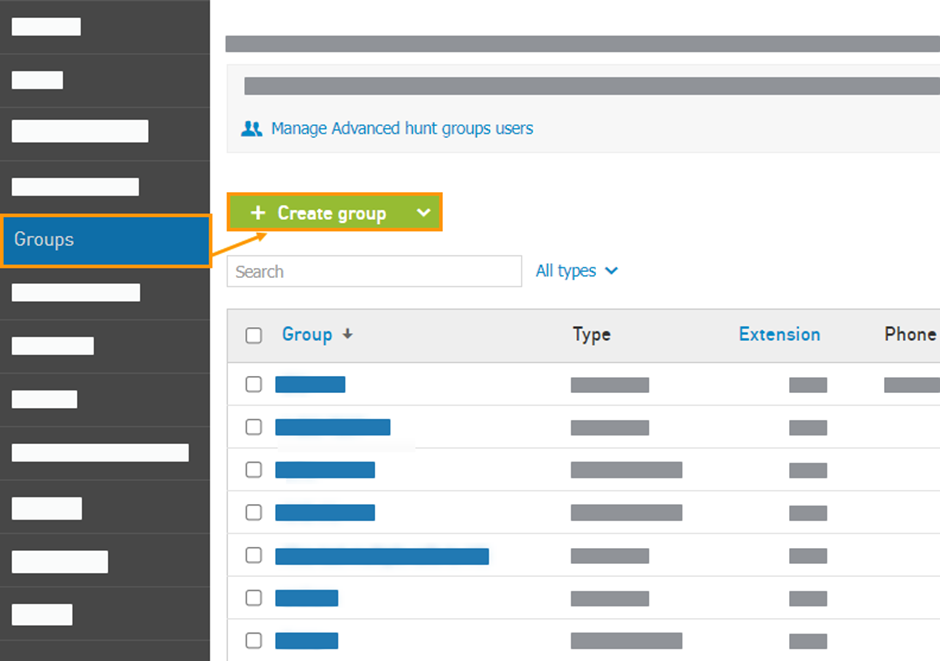
Select Advanced Hunt Group from the drop-down.
Enter the Advanced Hunt Group settings:
Name: Choose an easily identifiable name for the group; for example, Sales or Customer Service.
Extension: Type 3-6 digit extension that is not assigned to a user or another object.
Email for voicemail: Voicemails addressed to Advanced Hunt Group's built-in voicemail box will be delivered to this email address.
Ringing Order: Choose how calls will be distributed across agents. Note: you can move agents up and down in the list to determine their routing priority when using round-robin and sequential ringing order.
Round-Robin: Sends the call to the first available agent in a list, starting the search from the next agent in a circular manner each time.
Sequential: Sends the call to the first available agent in a list, starting from the top of the list each time.
Longest Idle: Sends the call to the available agent who has been off the phone the longest.
Ring-All: Sends the call to all available agents simultaneously.
Time zone: Specify the time zone for the Advanced Hunt Group.
Location: Choose a location the Advanced Hunt Group will be tied to.
Click the Create group button.