
Setting Up Auto Attendant Schedule
To specify the Auto Attendant activity periods or schedule, you will need to create Auto Attendant menus. They can have different greetings and different users/hunt groups/other objects assigned to phone keys.
When the new Auto Attendant is created, there are two menus that are created automatically, which are business hours and after hours. Business hours can be deleted or edited. Therefore, the first step is to set up the Auto Attendant Schedule is to edit these 2 default menus. You can always create additional menus if needed.
To set up the Auto Attendant business hours schedule, navigate to CONTROL PANEL > Services > Elevate > Auto Attendant and click on the Auto Attendant Name > create Business Hours.
On the setup page, specify:
Name of the menu
Schedule (Weekdays/Custom/24x7)
Menu options (Create a new menu or Link to an existing menu)
Click Next
Configure menu options
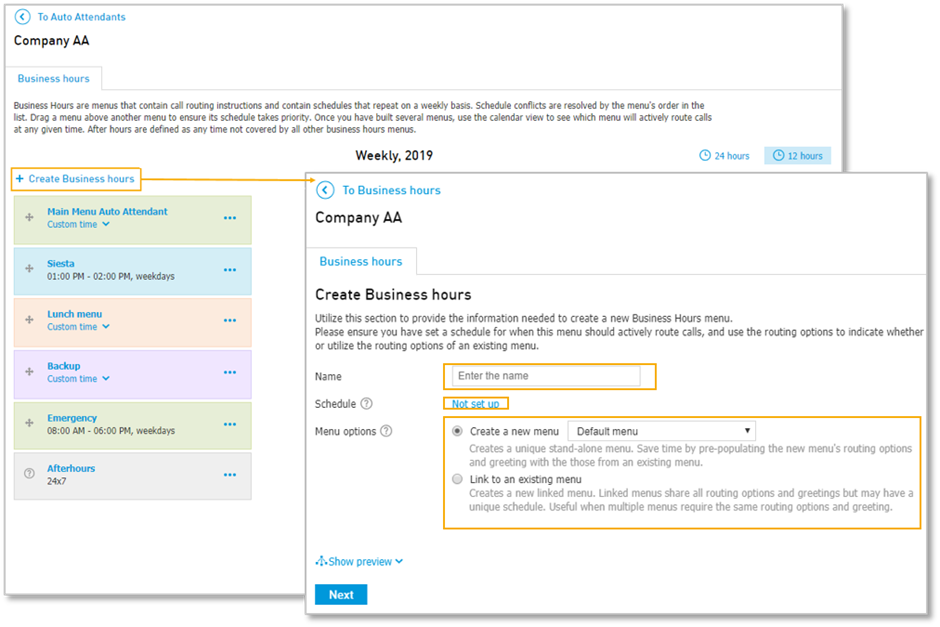
When creating a business hours menu, you can choose between 3 options:
Make a brand new menu with blank routing options (Create new menu and choose Default menu from the drop-down list).
Make a brand new menu with the routing options of an existing menu pre-populated in it (Create new menu and choose any other existing menu from the drop-down list).
Make a brand new menu that is linked to an existing menu (Link to an existing menu).
Create a new menu option allows you to create a new menu from scratch or to auto-populate the settings, including greetings, from an existing menu (just choose the preferred option from the drop-down menu).
Default menu option provides you with a blank routing. It is created with a generic default greeting and can be modified at will.
Pre-populated options will be convenient when you would want to create a new menu with many of the same routing options as an existing menu. This pre-populated menu is created with the same greeting as the source menu but may be modified as necessary.
Link to an existing menu provides the way to associate the menu with an existing menu. Linked menus are mirror images and menu changes reflect in both places. This type of menu is created with the same greeting as the source menu. The difference from the pre-populated is that the modifications made to any of the linked menus will update both menus.
You can create as many Business Hours menus as needed.
After hours menu is always enabled by default. It cannot be deleted or disabled. Any time period not covered by any other business hours menu will be set to after hours by default.